SOLANIS Optimization
Description
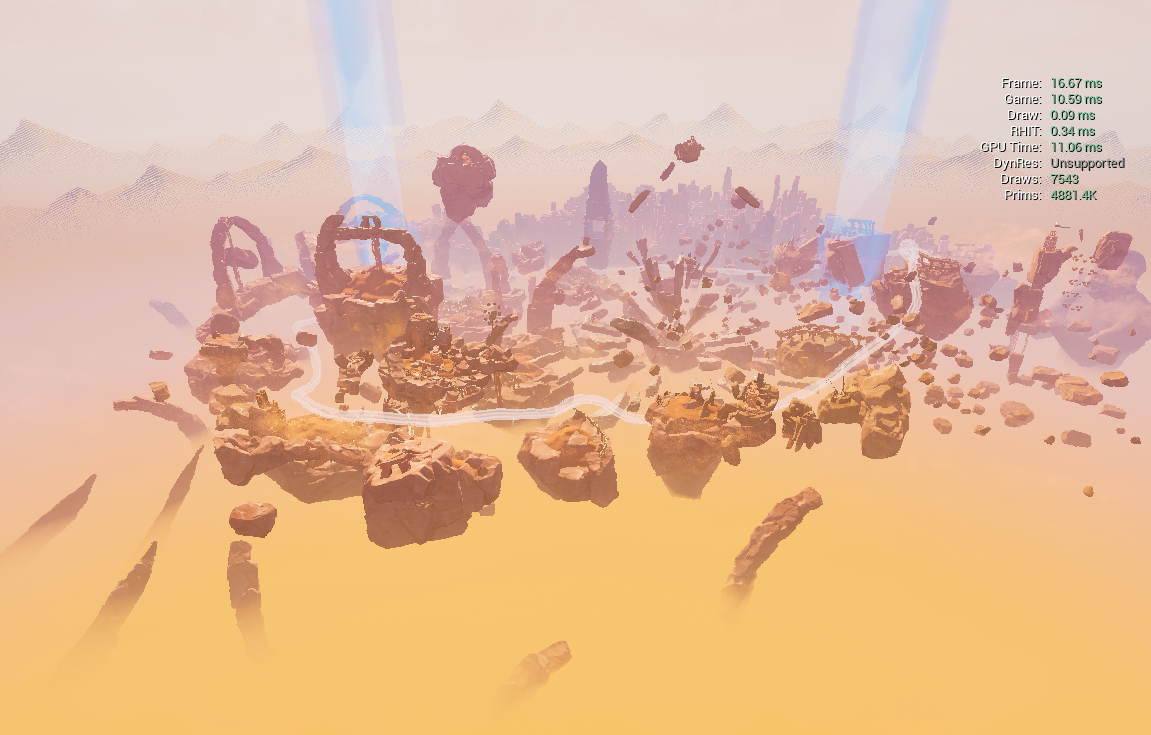
Hi everyone, this is a deep dive into my thought process as well as the tools and optimizations used on various pieces of the environment and scripts to create an experience that can run on relatively lower end computers on 60 FPS on high settings.
Geometry Optimization
As a key member of the team in charge of creating and handling a majority of the environmental pieces of the game, I needed to make sure that everything was accessible and able to run at 60 frames.
A majority of geometry in the scene (outside of props) were created using Houdini tools created by me (Look at my other breakdowns for those), however, coming out of Houdini a majority of the geometry created was relatively high poly for landscape and ended around 10k polys or 60k polys for the canyons. This needed to be worked on. In order to fix them we used ZBrush's dynamesh and decimate features to bring them down to acceptable levels while still maintaining some sembalence of quality without being too low-poly.
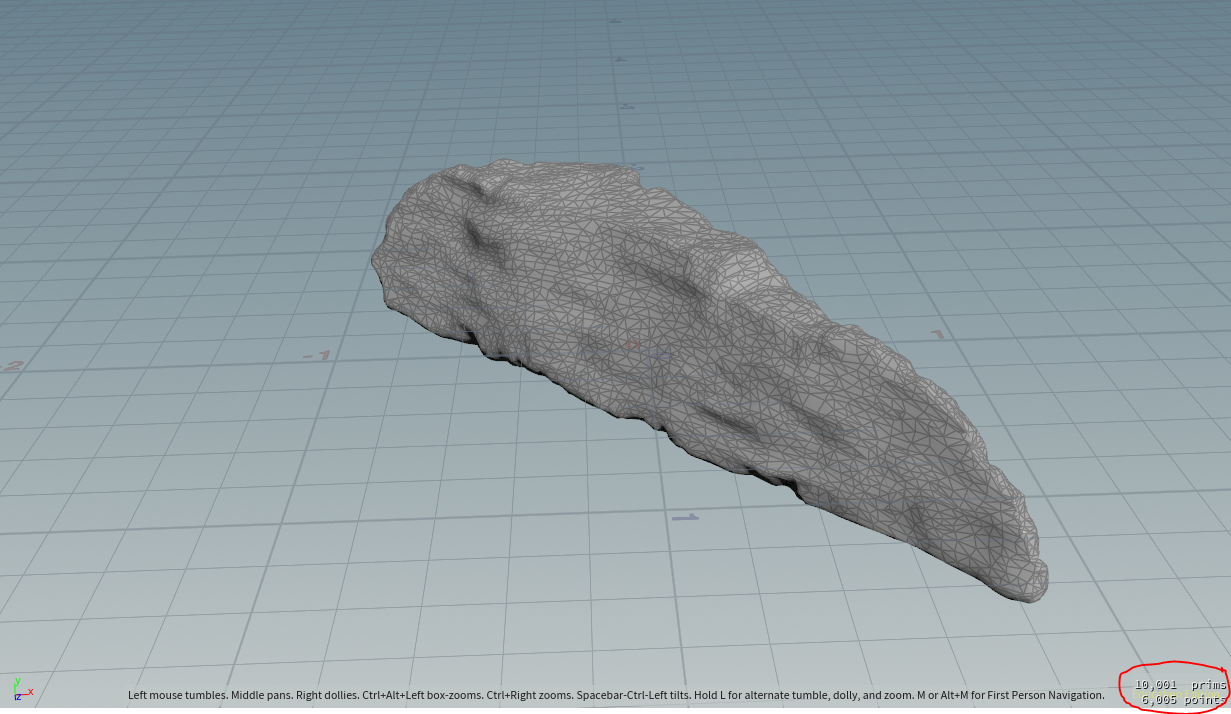
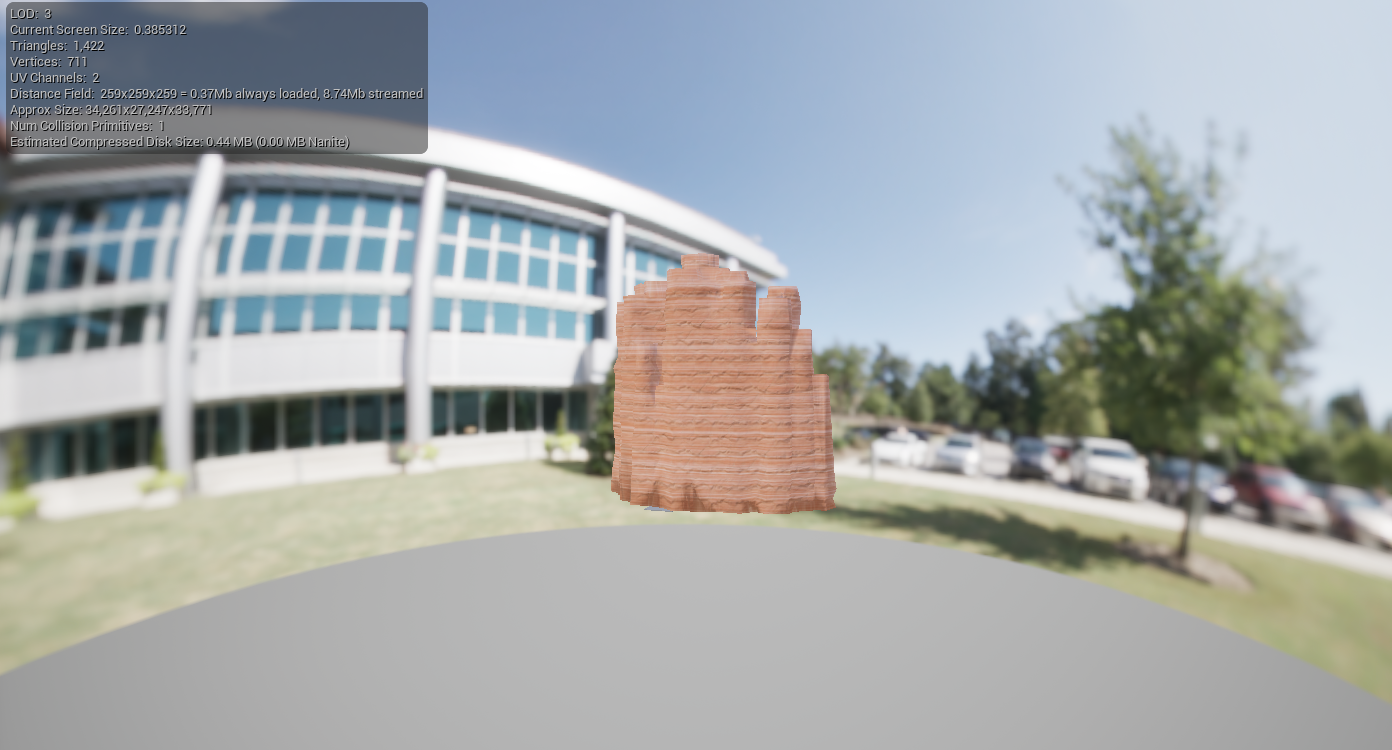
After importing properly optimized geometry into Unreal, I made sure to make some properly generated LODs. I did not generate them myself beforehand in Houdini or from ZBrush, however, I think Unreal's Auto LOD generation system works pretty well and created good results. After creating said LODs I adjusted the screen percentages on all of them to work flawlessly with the heat distortion post processing to get a seamless look in LOD loading of the geometry.
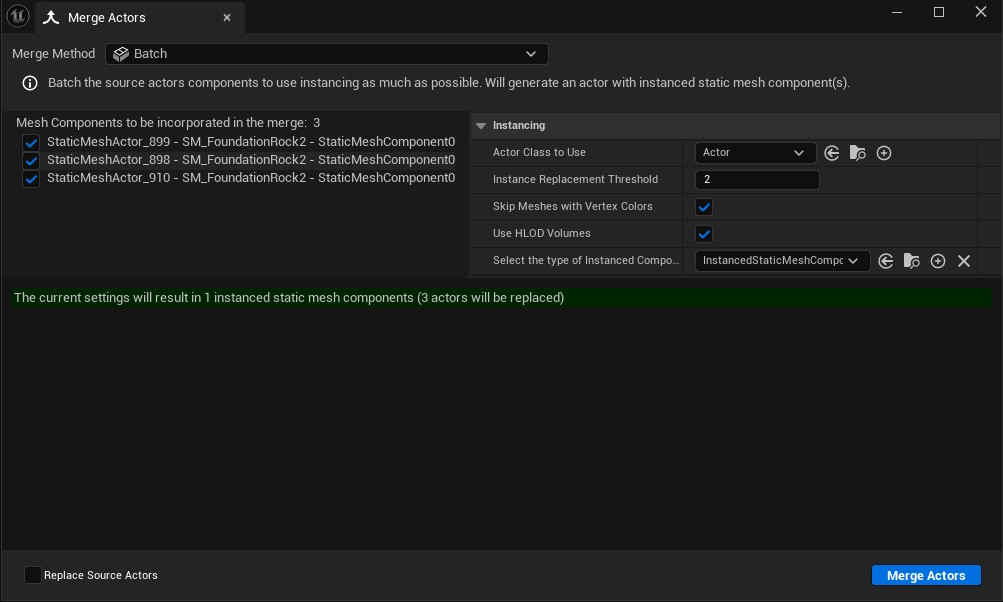
After looking at poly counts, I turned my attention to draw calls and batching. Having a small amount of draw calls within a scene, especially a scene with so many things rendered at the same time, is important for not overloading the gpu. The main fix that I used was the idea of batching HISMs.
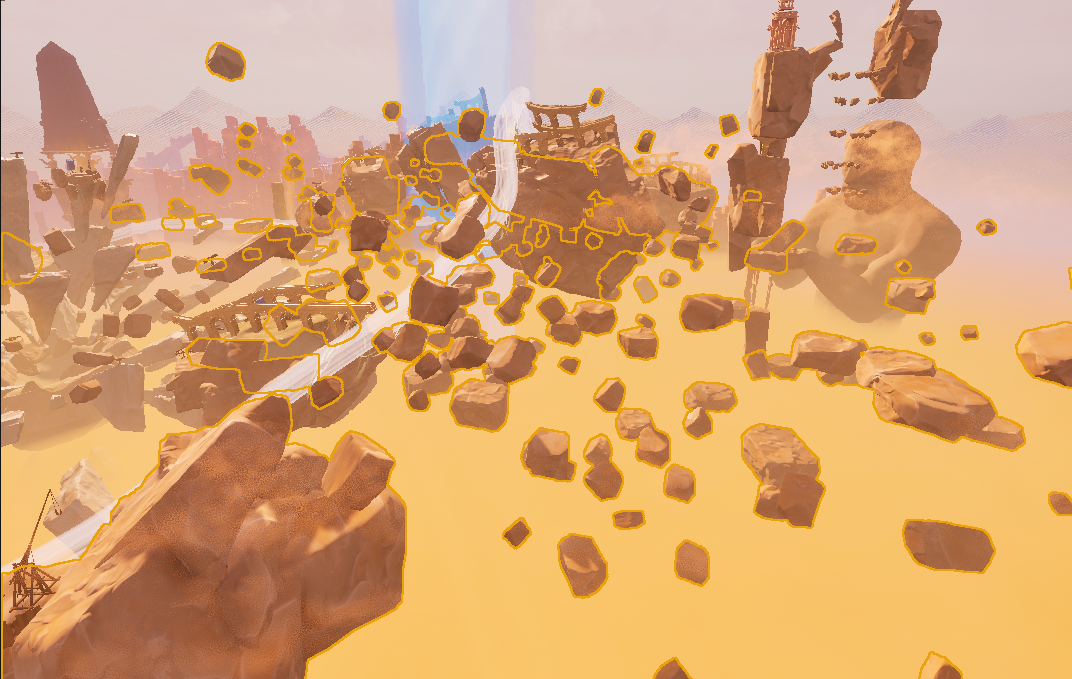
HISMs, or Hierarchal Instance Static Meshes allow me to batch the same static meshes together (helpful that our scene was the same couple of rocks and canyons) to allow for all geometry within those batches to share one draw call while still maintaining proper LODs that were created previously through the H in HISMs (Hierarchal)
This allowed us to take all of our big scene geometry and translate it down into about 8 or 9 HISM setups for our canyons and our rocks. Some of the heavier pieces of draw calls, specifically our wind tunnels with transparency made it hard to keep a balance, but making sure to batch where I could helped a lot.
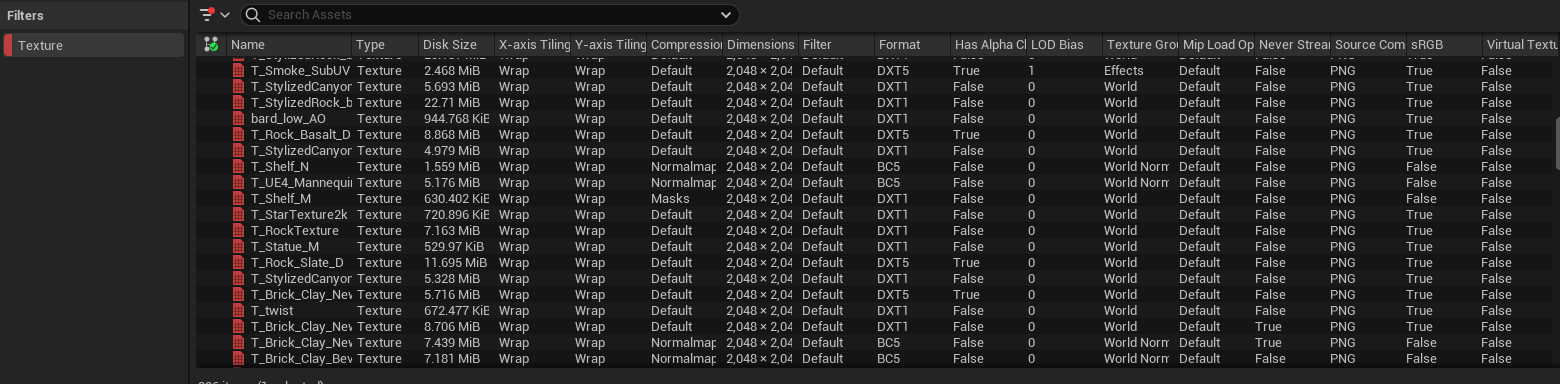
Finally, an important piece is texture optimization. A lot of the texture optimization came from the obvious of file sizes; making sure that every texture was 2K (2048x2048) was really important for making sure we had no super high resolution textures where we didn't need them. It also helped a lot of our geometry used 2-3 texture sets across almost everything with some variation created by shader magic.
\
Material Optimization
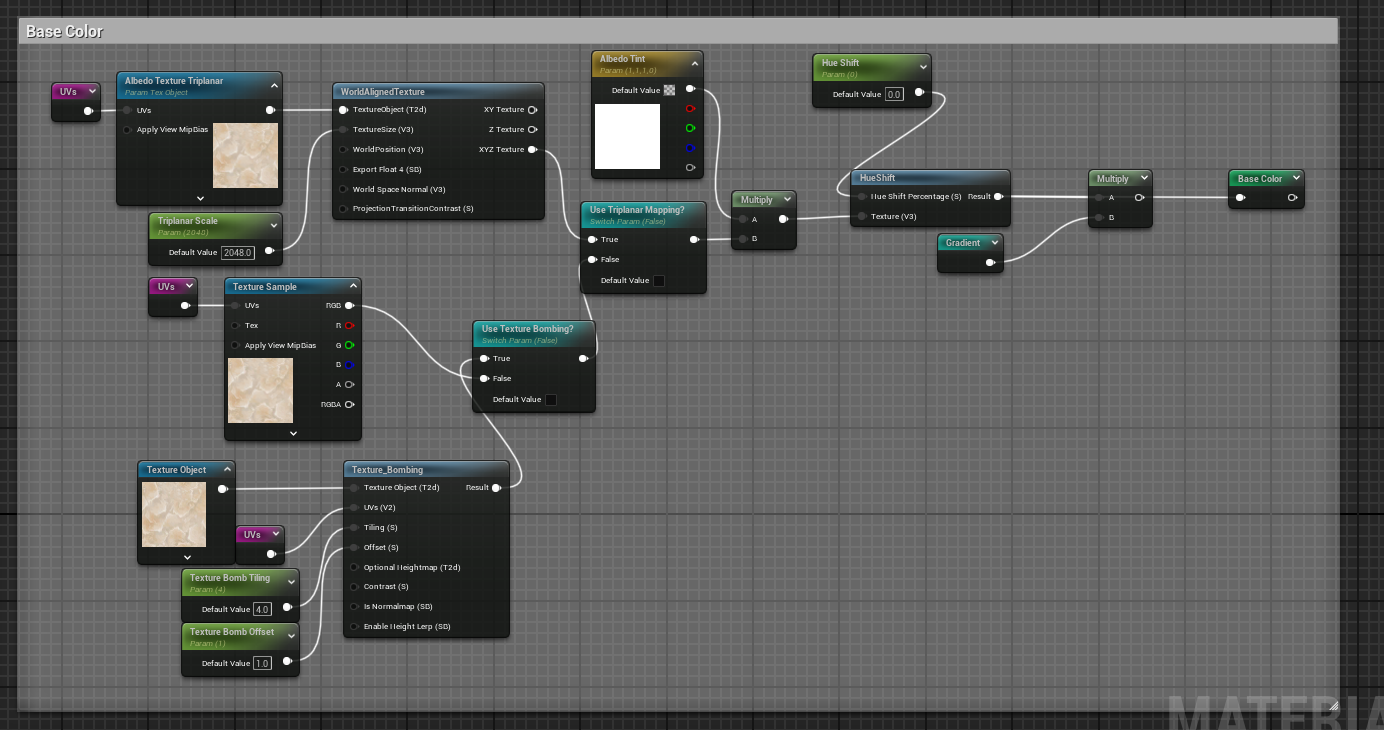
The materials that I actually used are not the those most optimized, however that was my point in creation, I wanted to allow for a lot of flexibility and variation using a small texture set. So I had to find optimization elsewhere.
Most of the environment goes through either 1 of 2 master materials, a rock master material, and a master material for everything else. They handle all textures that are need as well as things like texture bombing and triplanar mapping if need be to keep everything organized.
General Optimization
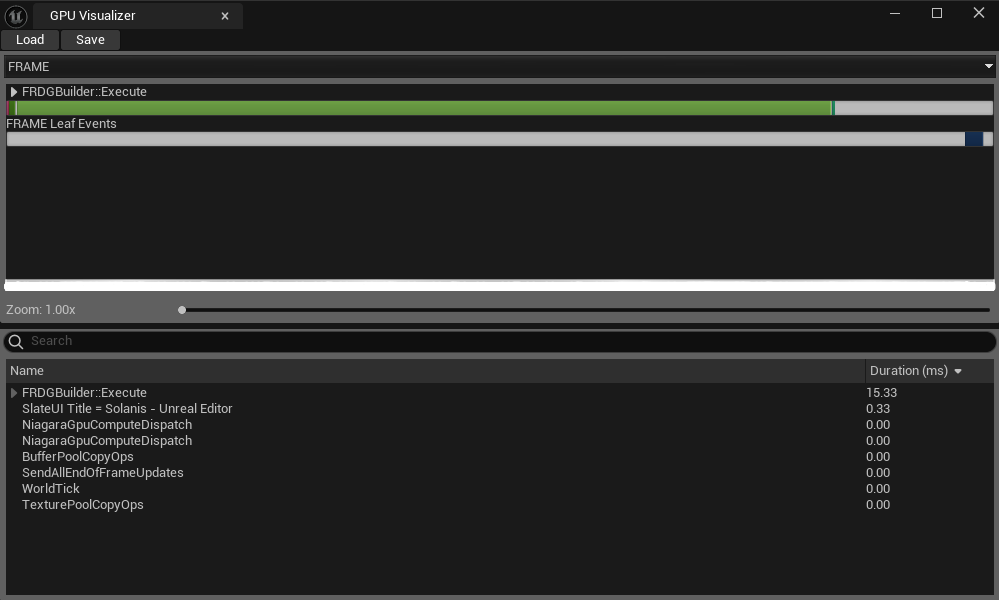
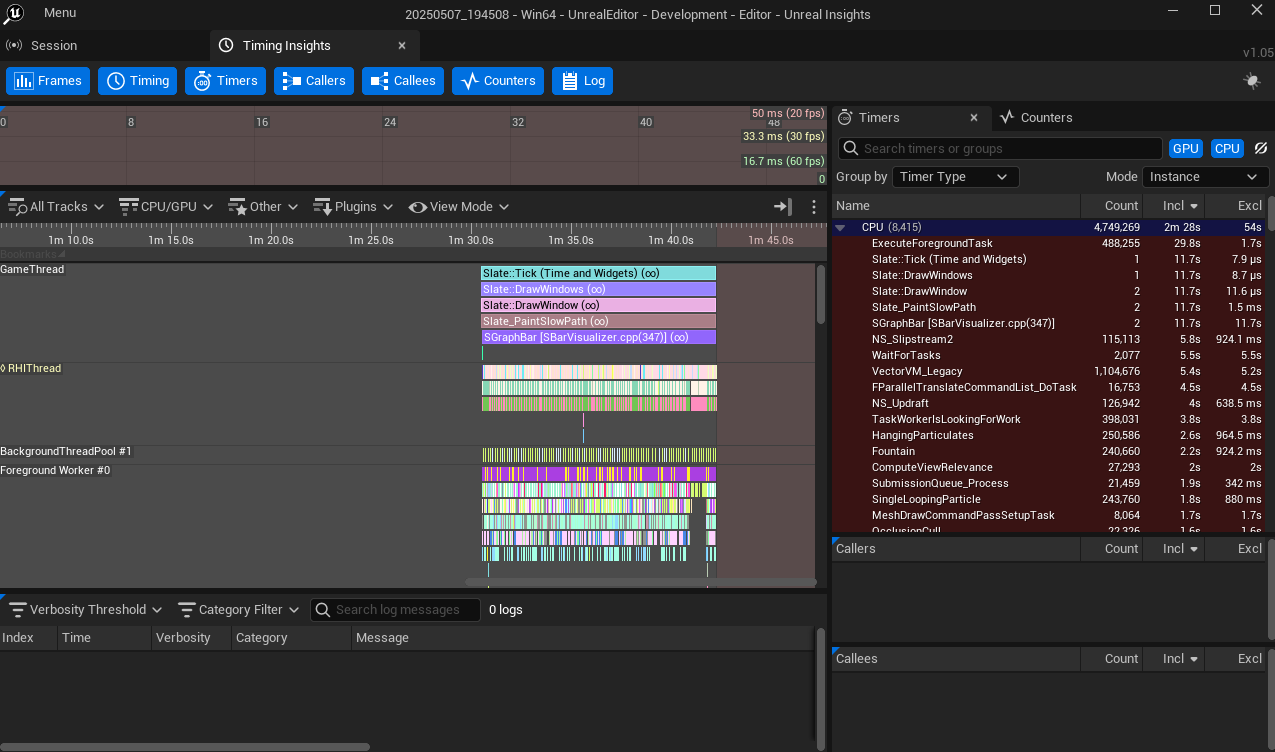
General optimization was found through a couple of CVAR's, specifically looking at the "STAT UNIT" graph, as well as looking at built in tools such as the GPU Visualizer and Unreal Insights. Each of these helped me diagnose problems on both ends of the CPU and GPU to help me really understand where the performance problems were coming from.
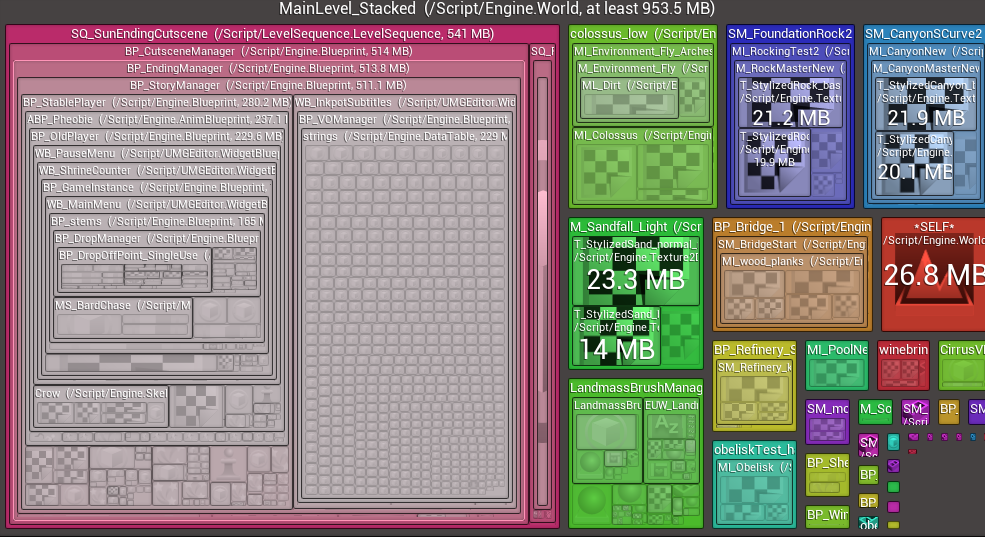
In order to optimize scripts and general level memory, I used the Unreal Size Map function, this allowed me to view everything within a .umap file that was taking up disk space and memory. It was really useful for cutting down disk size as well as general cleanup and where some unique performance challenges were laying.
What I Learned
Performance matters way more than people think: Having good performance is the one thing in a game that can tank a gameplay experience completely on it's own. Especially if assets aren't developed to work properly (looking at you deltatime) when your performance is lower than expected. Making sure that every piece of your game, from art to scripting, are well optimized and are game ready is a really important piece of development a lot of smaller indie teams miss.Don't just look at the GPU: Memory, disk space, the CPU; all 3 of these things are places of performance that you should look at diligently, not just the GPU. The GPU is a very important piece of that puzzle, but you don't want your performance to be bottlenecked in any sitation, not just a GPU bottleneck. Make sure to check and cleanup the rest of the threads as well.